MeshCom 4.0 Firmware current version 4.34y

There are two versions:
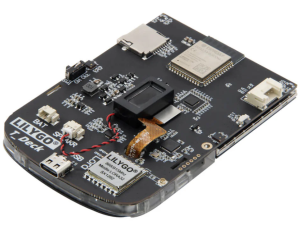
- T-DECK motherboard
- TFT display, keyboard, ESP32, LORA, SD
- GPS UBLOX
- T-DECK PLUS complete
- TFT display, keyboard, ESP32, LORA, SD, housing, 2000 mAh battery, external antenna
- GPS L76K
Features of the current firmware
- MAP module
- In the basic version, fixed cards are installed in the firmware
- Europe
- Germany
- Austria
- OE3
- OE1
- Further map material for reloading via SD card will follow
- In the basic version, fixed cards are installed in the firmware
- WEBServer
- Set SSID, PASSWD, WEBServer on via serial console
- TRACK mode
- Smart beacon dependent on movement speed and curve angle
- GPS is read out every 6 seconds
- GPS mode
- Time is set for a fixed
- Display of the number of satellites
- Signal quality display HDOP
- Keyboard short keys The keys with ALT + and SYM + must be released after pressing. The SYM + keys are not active in TAB "SND" and "SET"
- ALT + B
- switches the keyboard lighting on/off
- SYM + K
- Switch keyboard and TFT on/off
- SYM + L
- Switch TFT permanently to on or back to normal with timeout
- SYM + B
- Change TFT brightness (4 levels)
- SYM + O and I
- MAP zoom-out or zoom-in means it switches to the next map
- ALT + B
Hardware characteristics of T-DECK
- LCD display 2.8-inch, 320 x 240 pixels with touch
- Mini keyboard
- ESP32-CPU Dual-Core Processor
- 16MB Flash, 8MB PSRAM
- 2.4 GHz Wi-Fi & Bluetooth 5 (LE)
- SX1262 LoRa transceiver
- Trackball, Microphone (optional), Speaker
Firmware programming:
Attention Prepare T-DECK plus for flashing first:
- T-Deck switched off
- Hold down the trackball
- Switch on T-Deck
- Release the trackball
- A T-DECK is then in flash mode
- Start the WEB-Flasher https://esptool.oevsv.at and
- Category Release
- FW version 4.30í
- Board T-Deck, T-Deck-Plus (ready-to-use device with housing, battery and display)
- Connect
-
Instruction MeshCom-ESP32-Installer
Note: After the flash process, an error message appears which does not need to be heeded!
SD card:
- The firmware stores the basic data from the SETUP on the SD card
- Audio files (from the download) can be made available for operation before the first start.
However, the audio files are not absolutely necessary, - Audio files
- winxp.mp3 (Will be played after a reboot)
- bell.mp3 (plays when a new text message arrives)
GPS module installation
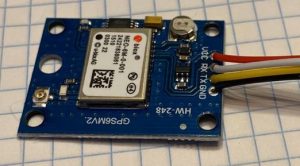
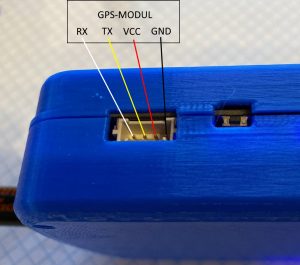
- The GPS module fits into the 3D-printed housing in the bottom compartment in the area of the antenna feed-through. The connections can of course also be soldered to the soldering points of the socket in the housing. ATTENTION: Compare the order with the printed circuit board.
- The GPS antenna with can be placed under the GPS module with the silver antenna side down. possibly fix the module with double adhesive tape with the GPS antenna.
- The GPS module is supported as of FW version TC 4.27/b
- The GPS is to be activated via the serial console
- -gps on
- The GPS module flashes by means of a blue LED
- Transmissions via LoRa-TX occur automatically every 30 minutes
- A GPS position message can be triggered with the command - -sendpos via the serial console.
- Debug/test messages can be activated with the command - -gpsdebugon via the serial console.
Case 3D
- Antenna feedthrough for external antenna
- Space for up to 3000mAh battery
- Space for GPS module + antenna
- Fit for top to bottom adjusted
Download 3D files
